
| 일 | 월 | 화 | 수 | 목 | 금 | 토 |
|---|---|---|---|---|---|---|
| 1 | 2 | 3 | 4 | 5 | 6 | 7 |
| 8 | 9 | 10 | 11 | 12 | 13 | 14 |
| 15 | 16 | 17 | 18 | 19 | 20 | 21 |
| 22 | 23 | 24 | 25 | 26 | 27 | 28 |
| 29 | 30 | 31 |
- 구글맵스
- button
- SpringBoot
- TextView
- TypeScript
- 오버라이딩
- Kotlin
- JS
- 랜덤넘버
- React
- Hook
- JavaScript
- 리액트
- 랜덤번호
- nodejs
- RecyclerView
- fragment
- 코틀린
- stylesheet
- GoogleMaps
- Javscript
- array
- 자바스크립트
- 스프링부트
- Linux
- Java
- 안드로이드
- scrollview
- npm
- Android
- Today
- Total
타닥타닥 개발자의 일상
자바스크립트, Express와 ejs를 이용해서 만드는 댓글 등록 및 수정 페이지 본문
페이지의 기본 구조
1. 전체 댓글을 볼수 있는 목록 페이지

2. 전체 댓글목록에서 detail 클릭 클릭하면 넘어가는 특정 댓글 페이지 (댓글 수정 및 삭제 가능)

3. 특정 댓글 수정페이지
4.새로운 댓글 작성 페이지

이 페이지는 서버를 구동하기 위해서 express 패키지를 사용하였으며 템플릿으로는 ejs를 사용했다.
또한 유니크한 아이디를 만들기 위해서 uuid 패키지, 특정조건에서 Restful 명령어를 실행하기 위한 method-overide 패키지도 사용했다.
package.json 파일
{
  "name": "reststudy",
  "version": "1.0.0",
  "description": "",
  "main": "index.js",
  "scripts": {
    "test": "echo \"Error: no test specified\" && exit 1"
  },
  "keywords": [],
  "author": "",
  "license": "ISC",
  "dependencies": {
    "ejs": "^3.1.9",
    "express": "^4.18.2",
    "method-override": "^3.0.0",
    "uuid": "^9.0.1"
  }
}
위의 패키지 내용을 복사 한뒤
npm install명령을 실행하면 동일한 노드 패키지 조건으로 설치 환경을 구성할 수 있다,
해당 페이지의 디렉토리 구조는 하기와 같다.

페이지 구동에 필요한 패키지가 설치된 node_modules 디렉토리,
특정 경로마다 반환할 페이지가 저장된 views 디렉토리
전체 페이지 경로를 설정하는 index.js 파일이 있다.
해당 페이지가 어떠한 패키지의 기능을 사용하는지, 어떤 경로에서 어떤 페이지를 반환하는지, 어떤 기능에서 어떤 Restful 요청을 사용하는지 등의 전체적인 흐름을 파악하고 싶다면?
RestStudty 디렉토리 바로 하단에 있는 index.js 파일을 확인하면 된다.

RESTful 문법 정하기
GET/comments- 모든 코멘트 리스트업
POST/comments- 새로운 코멘트 등록
GET/comments/:id - id 이용해서 하나의 코멘트만 가져오기
PATCH/comments/:id - 하나의 코멘트를 업데이트
DELETE/comments?/:id - 하나의 코멘트를 삭제
index.js 파일의 코드
//required는 특정 파일이나 패키지의 모듈을 불러와 현재 파일에서 사용할 수 있게 해주는 문법.
const path = require("path");
//uuid() 메소드를 실행하면 universally unique한 아이디를 만들 수 있다.
const { v4: uuid } = require("uuid");
//서버 구동을 위해 express 패키지 사용
const express = require("express");
const app = express();

//use는 어떤 방식의 요청이든 매번 실행되는 함수를 의미한다.
//Form 데이터를 POST 요청 BODY로 파싱하는 미들웨어
app.use(express.urlencoded({ extended: true }));
//들어오는 POST 요청(req)의 BODY를 JSON 형식으로 파싱하는 미들웨어
app.use(express.json());
//fake PUT/PATCH/DELETE 요청을 수행하기 위해 사용되는 패키지 methodOVerried
app.use(methodOverride("_method"));
//VIEW 폴더의 경로와 EJS 템플릿 설정
app.set("views", path.join(__dirname, "views"));
app.set("view engine", "ejs");

//화면에 보일 더미 데이터를 배열로 생성한다.
let comments = [
  {
    id: uuid(),
    username: "Todd",
    comment: "lol that is so funny!",
  },
  {
    id: uuid(),
    username: "Skyler",
    comment: "I like to go birdwatching with my dog",
  },
  {
    id: uuid(),
    username: "Sk8erBoi",
    comment: "Plz delete your account, Todd",
  },
  {
    id: uuid(),
    username: "onlysayswoof",
    comment: "woof woof woof",
  },
];

//comments 페이지로가면 코멘트 디렉토리의 index 파일을 렌더한다.
//index 페이지는 전체 코멘트의 목록을 보여주는 페이지다.
app.get("/comments", (req, res) => {
  res.render("comments/index", { comments });
});

// comments/new 페이지로 이동해서 새로운 코멘트를 작성하는 폼을 렌더한다
app.get("/comments/new", (req, res) => {
  res.render("comments/new");
});

//새로운 코멘트를 작성해서 작성된 데이터를 POST 리퀘스트로 전송한다.
//POST 리퀘스트가 성공했을시 전체 댓글 목록 페이지로 이동한다.
app.post("/comments", (req, res) => {
  //Post Request로 전달된 내용을 destructure
  const { username, comment } = req.body;
  //destructure 한 data를 comments 배열에 추가
  comments.push({ username, comment, id: uuid() });
  //요청이 성공했을 시 /comments 페이지로 이동
  res.redirect("/comments");
});

// app.get("/comments/:id", (req, res) => {
//   //id는 req의 param으로 넘겨주는 값, 즉 주소창의 파라미터가 id
//   const { id } = req.params;
//   //comments 배열에 있는 원소의 id 값이 req에서 요청한 id과 동일한 코멘트를 찾는다
//   const comment = comments.find((c) => c.id === id);
//   res.render("comments/show", { comment });
// });

// comments/show로 이동해서 특정한 id의 댓글을 보여준다.
app.get("/comments/:id", (req, res) => {
  //매개변수로 전달 받은 param을 id에 저장
  const { id } = req.params;
  //특정 id와 일치하는 id를 코멘트 배열에서 검색
  const comment = comments.find((c) => c.id === id);
  //특정 id의 댓글만 보여주는 페이지를 렌더
  res.render("comments/show", { comment });
});

// comments/:id/edit 경로로 이동해 특정한 id의 댓글을 편집하는 폼으로 이동
app.get("/comments/:id/edit", (req, res) => {
  const { id } = req.params;
  const comment = comments.find((c) => c.id === id);
  res.render("comments/edit", { comment });
});

//patch와 put의 차이 : put은 전체 내용을 완전히 새로 교체하는 것이고
//patch는 부분적으로 수정하는 것
//PATCH 명령을 통해 특정한 댓글을 수정한다
app.patch("/comments/:id", (req, res) => {
  const { id } = req.params;
  //req로 전달되는 코멘트 내용을 새로운 코멘트로서 대입한다.
  const newCommentText = req.body.comment;
  const foundComment = comments.find((c) => c.id === id);
  //id와 일치하는 코멘트를 새로운 코멘트로 수정한다.
  foundComment.comment = newCommentText;
  res.redirect("/comments");
});


//DELETE 명령어를 통해 특정한 댓글을 삭제한다.
app.delete("/comments/:id", (req, res) => {
  const { id } = req.params;
  const foundComment = comments.find((c) => c.id === id);
  //filter를 이용해서 배열에서 id값이 다른 element만 추출
  comments = comments.filter((c) => c.id !== id);
  res.redirect("/comments");
});

app.get("/tacos", (req, res) => {
  res.send("GET /tacos response");
});

app.post("/tacos", (req, res) => {
  //body로 보내진 요청(req)를 meat과 qty라는 변수에 파싱하고
  const { meat, qty } = req.body;
  //아래의 형식으로 응답한다.
  res.send(`OK, here are your ${qty} ${meat} taco(s)`);
});

app.listen(3000, () => {
  console.log("ON PORT 3000");
});
index.js 파일을 통해서 전체적인 페이지의 흐름을 파악했다.
그렇다면 특정 페이지의 구성은 어떻게 할 수 있을까?
상기 코드에 있었던 이 부분이 힌트다.
app.set('views', path.join(__dirname, 'views'))
app.set('view engine', 'ejs')
화면에 보여지는 페이지 경로는 views 디렉토리의 경로를 참조하며
화면에 보여지는 템플릿은 ejs를 사용한다는 말이다.

따라서 views 폴더 내부에 있는 html 파일들의 형식은 모두 ejs이다.
우선 전체 코멘트를 반환하는 index.ejs 페이지부터 확인해보자.
index.ejs
<!DOCTYPE html>
<html lang="en">
  <head>
    <meta charset="UTF-8" />
    <meta name="viewport" content="width=device-width, initial-scale=1.0" />
    <title>Comments Index</title>
  </head>
  <body>
    <h1>Comments</h1>
    <ul>
      <% for (let c of comments){ %>
      <li><%=c.comment%> - <b><%=c.username%></b></li>
      <a href="/comments/<%=c.id%>">details</a>
      <% }%>
    </ul>
    <a href="/comments/new">New Comment</a>
  </body>
</html>
ejs 템플릿 문법인 <% %>, <%= %>를 사용하고 있다.
<% %>는 자바스크립트 코드를 감싸고 있으며
<%= %>는 GET 명령어로 받아온 comments 배열의 element 프로퍼티인 comment, username, id값을 반환하고 있다.
받아온 특정 id를 a태그의 경로로 입력해서 동적 페이지 이동도 가능하게 한다.
그 다음으로는 특정 아이디의 댓글을 보여주는 show.ejs 페이지를 살펴보자.
show.ejs
<!DOCTYPE html>
<html lang="en">
  <head>
    <meta charset="UTF-8" />
    <meta name="viewport" content="width=device-width, initial-scale=1.0" />
    <title>Show</title>
  </head>

  <body>
    <h1>Comment id: <%= comment.id %></h1>
    <h2><%=comment.comment %> - <b><%=comment.username %></b></h2>
    <a href="/comments">back to index</a>
    <a href="/comments/<%=comment.id%>/edit">Edit Comment</a>
    <form method="POST" action="/comments/<%= comment.id %>/?_method=DELETE">
      <button>DELETE</button>
    </form>
  </body>
</html>
주목할 점은 form 태그로 DELETE 버튼을 감싸고 있으며, 해당 DELETE버튼을 클릭시 method 패키지를 이용해서 DELTE 명령어를 수행하게 하는 점이다. ?_method=DELETE 명령어를 통해서 버튼을 클릭시 특정 아이디의 댓글이 삭제된다.
다음은 새로운 댓글을 작성하는 form을 보여주는 new.ejs 페이지를 살펴보자.
new.ejs
<!DOCTYPE html>
<html lang="en">
  <head>
    <meta charset="UTF-8" />
    <meta name="viewport" content="width=device-width, initial-scale=1.0" />
    <title>New Comment</title>
  </head>
  <body>
    <h1>Make a new comment</h1>
    <form action="/comments" method="post">
      <section>
        <label for="username">Enter username:</label>
        <input
          type="text"
          id="username"
          placeholder="username"
          name="username"
        />
      </section>
      <section>
        <label for="comment">Comment Text</label>
        <br />
        <textarea name="comment" id="comment" cols="30" rows="5"></textarea>
      </section>
      <button>Submit</button>
    </form>
    <a href="/comments">Back to Index</a>
  </body>
</html>
눈여겨 볼 점은 form 태그는 원래 get 명령 밖에 수행하지 못한다는 점이다. 하지만 method="post"를 이용했다. 이는 method override 패키지를 통해 post 명령으로 form 데이터를 전송할 수 있게 한다.
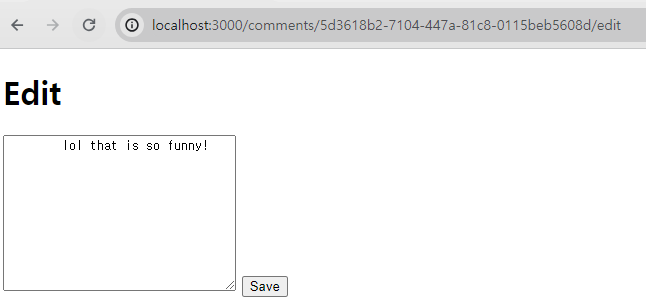
다음은 특정 댓글을 수정하는 edit.ejs 페이지를 살펴보자.
edit.ejs
<!DOCTYPE html>
<html lang="en">
  <head>
    <meta charset="UTF-8" />
    <meta name="viewport" content="width=device-width, initial-scale=1.0" />
    <title>Edit</title>
  </head>
  <body>
    <h1>Edit</h1>
    <form method="post" action="/comments/<%=comment.id%>?_method=PATCH">
      <textarea name="comment" id="" cols="30" rows="10">
        <%= comment.comment %>
      </textarea>
      <button>Save</button>
    </form>
  </body>
</html>
이 페이지 역시 new.ejs 페이지와 마찬가지로, method override 패키지를 이용했다.
이를 통해 GET 명령만 수행하는 form에게 POST 명령을 수행하도록 설정한게 보인다.
참고로 method-override 패키지를 설치하기 위해선 아래의 명령문을 입력하면 된다.
npm i method-override
제법 간단한 페이지로 보이지만,
이러한 페이지도 세부적인 디렉토리 구성과 추가 패키지 설치가 필요함을 알 수 있다.
또한 페이지 이동에 필요한 RESTful 문법을 잘 설정해야지 페이지 이동시에 오류 없이 이동할 수 있다.
해당 페이지에서 다뤄진 기초적인 부분을 잘 이해하고 사용한다면 후에 고차적인 페이지를 구축할때도 큰 도움이 될 듯하다.
'코딩 기록 > JavaScript' 카테고리의 다른 글
| connection error: MongoServerSelectionError: connect ECONNREFUSED ::1:27017 에러해결 (0) | 2024.05.08 |
|---|---|
| 윈도우에서 MongoDB, Mongosh 설치. Mongoose 이용해서 Node 환경에서 JS 파일로 데이터 삽입하기 (0) | 2024.03.05 |
| [JS/자바스크립트 ] Javascript JS closure의 사용예시로 closure 이해하기 (0) | 2023.10.13 |
| [JS/자바스크립트 ] 함수의 디폴트 밸류, 디폴트 값 (0) | 2023.06.19 |
| [JS/자바스크립트] 문자열 메서드를 모두 이용하여 복잡한 문자열을 구조를 갖춘 형태로 변환하는 함수 만들기 (0) | 2023.06.15 |


